

Using One of the World’s Best Reed Tools to Make Your Sound Awesome
Introduction
I have seen more and more players using the ReedGeek to work on reeds that are not performing to their standards. Before the ReedGeek, I used to use various grits of sandpaper to work on my reeds which sometimes worked but other times I ended up destroying the reed or sanding the reed down to where it was too soft.
No matter what strength or brand of reeds you play, I am sure you have run into boxes of reeds where more than 50% of them did not perform well.
Regardless of your horn, mouthpiece, or reed, the truth is, to the outside listener, you sound pretty much like...you. It's not that gear doesn't affect your sound at all, but your biggest and richest sound will only come by developing the skills within both your body and mind to sound great on any setup.
So if you're willing to move beyond having your day ruined by a lousy reed, then sax legend David Liebman's course, Ultimate Guide to Saxophone Sound Production is where you're going to want to go next.
Broken down into bite-sized lessons, this streaming video program covers just about every single aspect of saxophone sound production. It represents his entire life's work teaching the techniques and concepts that were handed down to masters such as Michael Brecker, Bob Berg, and Harvey Pittel (among many others), and then refined over the course of decades teaching countless lessons and masterclasses worldwide. Click below to see for yourself why so many professional saxophonists consider David's thorough, methodical, and practical approach the "real deal" for players at any level.

SAXOPHONETONE.COM
The Ultimate Guide to Saxophone Sound Production

Fortunately, I had a chance to meet with Mauro Di Gioia, owner and inventor of the ReedGeek, to discuss some of the techniques players can use with the ReedGeek to correct a mis-cut reed. I understand that some players, myself included, would normally take a reed out of the box and if it did not play very well, throw it out or move on to another reed. With some of the simple techniques that Mauro has taught me, I spend a minimal amount of time working on non-performing reeds and the overall benefit after being adjusted gives me a reed that I will practice and play on for many days.
Interview
Zach Sollitto: What are the benefits of using the ReedGeek over using sandpaper or a Reedrush?
Mauro Di Gioia: Sanding the underside of a reed is a commonly used technique by players of all skill levels. But from a mechanical point of view, it’s not the optimal method for achieving the desired results. Most players are not cognizant of how quickly sandpaper loads up. They assume that holding a sheet of sandpaper on a piece of glass and running the reed back and forth several times will make it flat. Seldom is that the case.
There are other so-called resurfacing tools out there that purport to remove warpage but they mostly polish the underside of the reed, often compressing fibers, rather than flatten it. As far as using a piece sandpaper or reed rush to adjust the reed’s profile, side rails and tip area, the problem is not only that the abrasive surface loads up quickly, but pinpoint accuracy is difficult if not impossible to achieve.
With a ReedGeek and only minimal practice, you can easily and effectively flatten the back of your reed to eliminate warpage. But that’s not all. You can also remove imbalances at the tip. You can work the reed’s profile from shoulder to tip, with great precision, according to your preferences and you can take minute amounts off the side rails, freeing up the reed’s vibrations. The ReedGeek is the only tool on the market that is an all-in-one precision reed adjusting/maintenance instrument, utilizing state of the art steel and machining, which is made 100% in America.
ZS: What basic steps do you take when adjusting a non-performing reed?
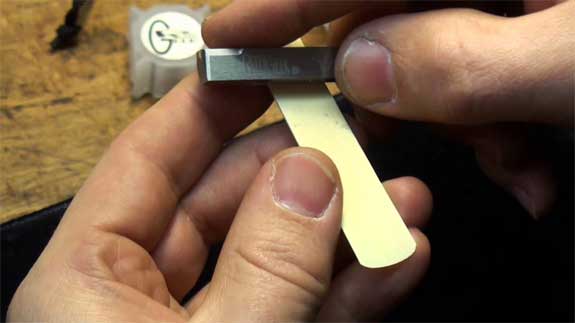
Mauro: First and foremost, flatten the back of reeds with the ReedGeek! When the reed is not flat against (sealing) on the mouthpiece, air leaks from your system (mouthpiece, reed and ligature). Always flatten your new (fresh out of the box) and old reeds by laying the ReedGeek on any one of its completely-true edges perpendicular to the reed and letting the weight of the tool find the high spots as it’s being pushed/pulled across the length of the reed table. Make sure to flatten the table using consistent pressure, proceeding lightly to and off the reed’s tip. Flattening is very important as it enables you to ensure that the whole reed is seating on the mouthpiece table, rails and tip for optimal vibration. Especially on new reeds that haven’t seen water, the flattening process starts sealing the pores so when they do take in moisture it will be in a more uniform way.
Those broken in or perhaps blown out older reeds that you have yet to throw away are most likely suffering severe warpage. Repeating the flattening procedure, but with more gusto will often resurrect these tired reeds. You might even give them a thorough soaking and then re-plane them with the ReedGeek — it’s okay to remove some cane from the table, there’s plenty there. Frequent flattening is where the ReedGeek works its magic and will continue to do so for the life of your reeds.
ZS: What advanced steps do you use when fine tuning a reed?
Mauro: With the reed flat and sealing on the mouthpiece table the outer areas of the reed, which are known to be the most responsive areas, can now be adjusted. The goal is to make the reed ultra-flexible as it vibrates along your mouthpiece facing curve. Start by flexing the reed with your fingertips and visually inspect it to see if one rail is heavier (thicker) than the other. If so, this will need to be shaved down. When using the ReedGeek, this can be accomplished with one of the scraper blades on either side of the tool or by any of the edges on the body of the ‘Geek being lightly dragged the length of the rail. Similarly, the corners of the reed (the “ears”) can be addressed. Again, very lightly bend the right and left “ear” with your forefingers to determine symmetry. These need to be balanced, much like the wings of an airplane, for consistent air-flow, sound resonance and natural playability.
When adjusting with the ReedGeek, this area can be blended with the radius end of the tool (the “pencil eraser”). The final way that the perimeter can be addressed is by smoothing out the denser (darker) spots that lie on the outside of the spine. This can be difficult to do with tools other than the ReedGeek as gouging can occur. However, with the ‘Geek’s “pencil eraser” tip, pinpointing dense areas and erasing them can be easily accomplished. When all adjustments have been made the outer perimeter of the reed should be smoothly blended toward the spine (heart), and this area should be in the shape of an inverted U or Christmas tree. Note: The more open your mouthpiece and the longer the facing the more elongated the Christmas tree shape should be because the reed has a longer palate on which to vibrate.
Overall
I hope these tips help those (including myself) better understand how to use the ReedGeek. If you were thinking of picking up a ReedGeek but were unsure how to learn the various steps to perfect your non-performing reeds, these steps should help facilitate that process.
Please leave any comments or tips for ways you use the ReedGeek.
Check out Best. Saxophone. Website. Ever.’s review of the ReedGeek
Instructional Videos
http://www.downbeat.com/digitaledition/2014/DB1405/single_page_view/86.html
March 21, 2015 @ 11:59 am
This tool is everything it claims to be. Trust me — I’ve been playing sax since Lyndon Johnson was President, and have tried everything to work on “bad” reeds. Maybe I just wasn’t that good at it. Whatever. I’ve just had almost no luck, and settled in to the habit of just tossing reeds that didn’t play out of the box, then tossing good reeds that went “bad.”
However, I’m proud to say that, following the easy instructions in the Reed Geek videos, I recently was able to successfully balance a reed that I would have tossed away in the past. In fact, it became a very good reed. Again, this is something I have never been able to do before! It’s all a matter of having the right tool and following the simple instructions. The key is to adjust very gently until you get a feel for roughly how much cane has to come off to make a difference.
Even if you use the Reed Geek for nothing other than flattening the reed out of the box — and periodically re-flattening as you use it — it’s worth it. You will get more usable reeds by doing nothing more than flattening — even more by adjusting.
October 25, 2016 @ 2:30 pm
I was glad to hear that you had success with the brand of reed that worked well for you. I have had a lot of problems find one that worked well for me as well as lasted. I am grateful to also read some other techniques that will help with sound and playing. I will be sure to check this out. Do you have any other advice on the reed or techniques that could help?