

8 Things You Can Do Today to Instantly Pump Up Your Saxophone Sound
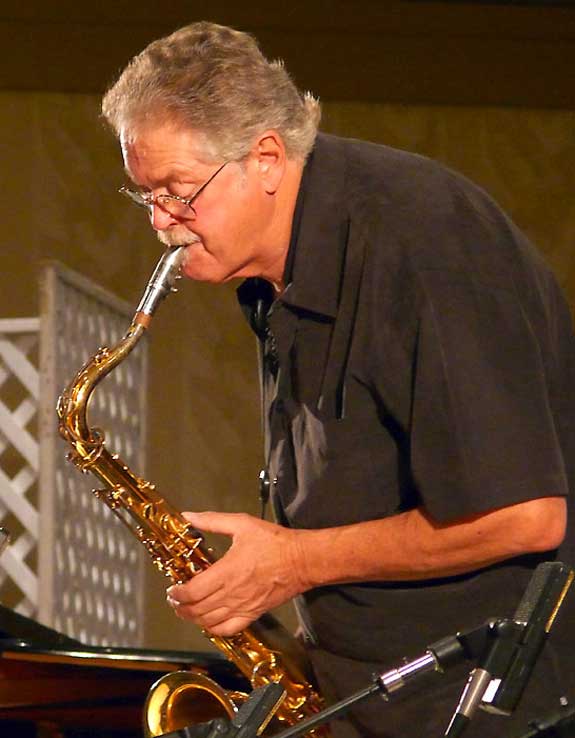
Photo by Jimmy Emerzian ©2007 downbeatphoto.com
You know the saying, “you can never be too thin or have too big a saxophone sound…”
Ok, well maybe that’s not really a saying, and maybe there is such a thing as being too thin (hey, I live in L.A., I know these things).


But seriously, just about every single set of eyeballs reading this article is attached to the body of a saxophonist eager to supersize their tone. Of course, we all want to sound pretty, but that prettiness needs to have some hefty (yet precisely controlled!) sonic mass behind it. Aside from having an attractive tonal color, a great saxophone sound should effortlessly fill up a room without the need for the saxophonist to be popping a vein in her neck, blasting the horn with hurricane-force air blasts.
We all aspire to be that saxophone stylist whose tone is flush with the entire harmonic spectrum, low lows to high highs, the frequencies delicately balanced to form a sublimely enrapturing sonic ambrosia.
Yeah – that…but with BALLS!
With all of that said,, here is, as advertised, my list of 8 things you can do, today, that will leave you walking out of the practice room able to boast of a sound bigger and stronger than you had when you walked in.
1. Overtones
For those of you new to the concept, overtones are basically alternate fingerings for notes that generate a louder and more resonant, albeit harsher, sound on the horn (newbies can get themselves up to speed with this article). But once you start moving up through the range of the horn, some of these overtones become quite difficult to play consistently. Truly mastering the overtone series forces you to develop control of the muscles in the mouth and larynx that allow you to enlarge and focus your sound in a MAJOR way.
The trick is to keep working towards matching the size of the sound of the normally-fingered notes to that of the overtone-fingered notes. Of course, that will be like a dog chasing its tail, since the bigger your normally-fingered sound is, the bigger your overtone sound will be, so your normally-fingered notes will never match the volume and resonance of the overtone fingerings. But there’s a ton of growth available in the chase.
You can find some great overtone exercises with sheet music and audio examples here.
2. Practicing on the Mouthpiece Alone
As much as it may torment those sharing a home with you (not to mention your neighbors three blocks away) playing on the mouthpiece while it’s detached from your horn is another killer workout for your chops, and really, for your sound-producing capabilities in general. It’s basically another way of exercising the same muscles that you exercise when you practice your overtones, since you don’t have the convenience of those pearly keys to control which note you’re actually shooting for.
Try playing some scales or arpeggios on the mouthpiece, but don’t cheat and use your lower jaw to change pitch. Instead, use what Joe Allard refers to as your “inner embouchure” to make these notes happen, and you’ll find that your powers of tonal production have been officially supersized!
More details on this hideously-sounding-yet-massively-beneficial practice can be found here. Want some more mouthpiece-only exercises as taught by Joe Allard, himself? Then hop on over here.
3. Roll the Lower Lip Out
There are two basic schools of embouchure. One, espoused by many classical players and teachers (most notably, Larry Teal) involves playing with the bottom lip tucked into the mouth The other approach involves playing with the bottom lip rolled out – or ideally, laying naturally under the reed, positioned the same way it would be if you were simply speaking. This method is most popular with jazz players, although it was taught by sax teaching legend, Joe Allard, who taught both jazz and classical saxophonists.
In my experience, the lip out method produces a noticeably bigger sound.
A good rule of thumb is to make contact with the reed using the fleshiest part of your lower lip. This way, the reed can vibrate as much as possible while you use the least amount of pressure necessary to hold the mouthpiece in place.
If you’re used to playing with the lip rolled in, playing with the lip out will take some getting used to, as the sound will be harder to control at first. But hang in there, it will definitely be worth the temporary awkwardness.
More on this topic here.
4. Practice Your Long Tones (duh!)
I don’t really need to go into too much detail on this one. In fact, you’re probably all sick of hearing teachers telling you to do these, but long tones are crucial for tonal control. To get the most out of these, practice fading in from silence all the way up to fortissimo and then back down to silence. For bonus points, practice doing this breathing only out of your nose, as this will really work your embouchure muscles as you go through your long tones without a break.
Still dreading the boredom of long tone practice? Here are some approaches to long tone practice that will make playing them a heck of a lot more fun.
5. Play Using the ‘EEE’ Sound
Coming back to our man Joe Allard again – here is a method he taught which is counter to what many of us have been taught. Most of us have been instructed to blow through the horn keeping in mind the “AAH” sound. But as I explain in this article, the “AAH” sound causes you to lift the tongue, which blocks off the passage of air from the throat and out of the mouth.
The “EEE” sound, on the other hand, forces your tongue down towards the bottom of your mouth, leaving a much larger passage for the air to travel through, thus making your sound that much heftier.
6. Avoid Tension While Breathing
For this tip, I’m going to be lazy and simply rip off a few paragraphs from my instructional program, Bulletproof Saxophone Playing (sorry for the somewhat shameless plug, but bear with me, this is good stuff).
Here is a great snippet on the topic of breathing, as shared by one of the program’s teachers, Alexander Technique master, Bill Plake.
If you watch the people who breathe beautifully, what you’ll notice is what they don’t do. You won’t see them tighten their heads down on their spine and throwing their heads back. You won’t see them tighten across their shoulders, you won’t see them holding across their chest trying to force their stomachs out. What you will see is you see the whole torso expanding in all dimensions.
It’s a three dimensional movement – as we breathe in, our torso gets longer, it gets wider, and it gets thicker from front to back. The whole torso, not just the tummy, everything; let the entire torso move.
One person who had extraordinarily good breathing was Michael Brecker. If you watch videos of him playing, you’ll notice that when he takes that in breath you don’t see him bearing down on himself, you don’t see him losing his stature. You see him maintaining his stature and the same thing when the air is coming out, you don’t see him launching down into his gut to push the air out. You see him maintaining his stature.
Another saxophonist with masterful breathing was Charlie Parker. In fact, watch Charlie Parker in general if you want to see someone who leaves himself alone when playing the saxophone.
7. Practice Proper Articulation
Most of us think that mastering articulation equals having superb control of the way individual notes begin. But solid articulation has the added benefit of bolstering your sound in a major way.
For example, if you’re tightening your jaw every time your tongue attacks a note, that means you’re cutting off precious air. To make matters worse, many of us have a habit of moving our throats when we articulate, which cuts off the air as well.
To delve deeper into what I’m talking about, check out this article here.
8. Forget About Finding Better Gear
It’s funny since I’m not really a saxophone gear head (as anyone who’s emailed me asking about a specific brand of vintage horn or mouthpiece can tell you), but even I love trying out new gear to hear how it affects my sound. If you listen to me trying out a bunch of horns and mouthpieces at NAMM 2013 in this video, you’ll see that while there are differences from horn to horn and mouthpiece to mouthpiece, those differences are not totally radical.
At the end of the day, you’re going to sound like you. Maybe you with a slightly brighter or darker or softer or louder or whatever sound, but to the average listener, you’re almost certainly going to sound like the same sax player.
The point of having the right saxophone gear is to help get you to the inevitable sound of YOU as effortlessly as possible.
So let’s all just agree now, there’s no substitute for putting in the time necessary to get that big and beautiful sound, regardless of which horn or mouthpiece you’re playing on. No magical horn, mouthpiece, or reed is going to swoop in and transform a frog into a prince.
What’s important is that you have in your “mind’s ear” the precise sound that you’d like to produce, and learn to shape your sound until you reach your sonic target.
You can read more on this hot topic here.
Off You Go!
So now that you know what to do, you have no excuses. Well, you probably do have some excuses, but I accept them with great hesitation!
But seriously, if you’re tired of hearing your sound dwarfed by the guy or girl sitting next to you in the section, then pick up the tools I’ve shared here, and if you have used any or all of these tools, leave a comment below and tell us about it!
Until next time…
July 22, 2013 @ 5:45 pm
Doron:
Good stuff, I totally agree.
Larry W
July 22, 2013 @ 5:56 pm
Thanks, Larry!
October 3, 2015 @ 4:21 pm
Just checkin’ in…..this is all great information….I’ve been a player all my life of a variety of music. Even at my age of 77 I am still out there. thanks all for great input and instruction…Maury
October 11, 2019 @ 3:36 am
Many years ago I saw our sax player put his hand in the bell of his horn, tip it upside down and put whatever was in his horn in his pocket. Later I asked him what it was. He told me that it was Five Silver Dollars. (or silver quarters if they make silver quarters…pretty sure it was silver dollars)
He said an old timer had told him about this trick to get a ‘raspy’ sound. The coins vibrate against each other and against the horn. The secret is that they are silver and there are 5 of them. (3 might work as well) I’m just curious as to whether you have ever heard of this. Thanks
July 24, 2013 @ 1:53 pm
Definitely agree that a lot of players put way too much emphasis on gear and for the wrong reasons. Launching a quest for Florida Link or magic VI is not going to transform anybody’s playing.
The most important criterion for good equipment isn’t what it does, but what it doesn’t do, i.e. impede the development of your sound. We’re all familiar with players who mold their style excessively around limitations of their technique. But sometimes technique runs up against limitations in equipment, and that can also be limiting to a player’s style. Figuring what’s going on when a technical wall is encountered can be kind of tricky. Sometimes shortcomings in equipment remain latent until a player is pushing their tone and technique. If the player is lucky, it’s a minor issue with condition or adjustment. But sometimes it really is an inherent limitation based on design or quality.
My experience runs the whole gamut – most of the time the solution was practice, practice, practice; less commonly (but too often) it was a repair or adjustment issue that went unrecognized; and on a few occasions a piece of equipment was simply unsuited for what I was trying to achieve. Most recently, a more rigorous and exacting practice routine exposed a response problem. The solution was a simple procedure on the mouthpiece performed with hardware store supplies. Got off cheap!
July 25, 2013 @ 3:26 pm
Awesome insights! I do think that it’s good to have at least decent equipment in good working order so that we’re not developing bad habits to compensate for the equipment’s shortcomings. But I still think it’s good from time to time to try some different gear out just in case something jumps out that gets you to where you want to be much faster than if you tried getting there with practice alone. As long as new gear isn’t a crutch, then we’re all entitled to something shiny and new from time to time, no?
July 26, 2013 @ 1:36 pm
Well…. playing something that looks like a sewer pipe is my comfort zone. Purchases driven by testing against a performance objective seem justified. But sometimes there’s the pressure to seek validation through gear, and that’s where players fall into a trap. Peer pressure, teacher pressure, razzle dazzle pressure…. There’s a guy who fulfilled his dream of owning a Selmer with a Reference 54. He found out that he preferred the horn he’d had for 30 years. Ouch!
August 15, 2013 @ 8:46 am
Doron & TenorMoxie:
Well I also believe having good gear in good working order is a big help. However I’ve known guys who have become totally obsessive with buying new stuff. One guy from the Navy started out w/a Yamaha, and a Gary Sugal mpc. Then he went to a Conn 10M w/a Selmer neck with a old NY Link, since then he’s gone through at least several other Selmers, a HR mpc and now I believe he has gotten a Selmer BA or SBA.
Another guy I knew in college was always getting a new mpc every few weeks. Another guy in the Navy thought a new Link was the ticket. He didn’t know the difference between a new 90’s Link and a FL Link. He just knew Coltrane played a Link so he had to have one. Another young Navy guy just had to have the brightest Guardala mpc I believe it’s called the King.
You know what, none of these guys sounded any different after they got the new gear than they had before for the most part. At the most they only sounded marginally different. The big thing is to PRACTICE and practice the right stuff.
I hate to say it but the good old fashioned practice of scales and how to apply them works wonders. Scales should be practiced the whole range of the horn, so play a C scale from low C to high F down to low B and resolve it on low C. Then there was years of playing long tones and overtones. It’s boring but it really works.
For improv for me it was taking those scales and then using the Jamey Aebersold’s and slugging it out over the different tunes and styles.
For sightreading it was taking any etude and playing it WITHOUT STOPPING regardless of mistakes. Then afterward go back and clean up the mistakes after you’ve sight read the music and play it again. For jazz styles the Lennie Niehaus books were the stuff. Now I would add the Greg Fishman Books w/the CD’s, really great stuff.
The thing about the FL Links and the older Links in general was that they had a lot of hand work done on them while they were being made so let’s say you tried some 5*’s at Ponte’s in NYC back in the day. Every one would play slightly different but all played well. You just had to pick the one that seemed to suit your needs. But you knew you were getting a quality mpc. Today the Babbitt CO which bought out Link back in the 70’s just makes the mpcs as a production run on machines. There is no hand work done, everything is a crap shot. Same for saxophones, back when the MK VI was being made or the Conn 10M there was a lot of hand work involved by craftsmen who took PRIDE in what they were doing and believed in what they were doing. Today everything is mostly run by machine.
The thing is some people feel they have to have that magic Link or MK VI or Conn 10M. Yes those horns were great but they have to be kept up in good repair especially if it has been sitting around a while and not played. BUT the horn WILL NOT PLAY ITSELF. It must be in good working order and you have to PRACTICE. A good Link will let you SHAPE your SOUND on IT. But you must PRACTICE with it to DEVELOP your SOUND.
Okay I said enough. BTW TenorMoxie are you from the New England area where they make the soda called Moxie? The advertisements said “it takes a lot of Moxie to drink Moxie.”
As far as my stuff I have owned a Selmer MK VI that I bought new when I was in college back in 1974. It’s a 214,xxx series. I played it with an older Brilhart that my teacher gave me. Then I ended up on a HR FL Link 6 for quite a while. However while playing in an Army Band I found that I just needed more upfhm. The mpc was closing off on me at higher volume levels. I got a FL 5* metal Link at Johnny Smith’s Store the Jazz Gtr player, in Colorado Springs. This worked great for a long time. By the time I was in the Navy Band I needed a harder reed to make it work. I was up to LaVoz Med Hard and some of them were to soft. Well at that point because I loved the Link sound I was on the lookout for a older but more open Link.
One day at a rehearsal another sax player said, “hey I have these Link tenor mpcs, anyone interested”? I said “yeah, what are they?” He said, “a 5* and a 8*.” A retired Army Band guy gave him the Links. I took them both but was only interested in the 8*. I took them home, played it and that was it. I called the ex-Army Band guy up asked him how much. He wanted $95 for both or $50 a piece for just 1 mpc. I bought the 8* from him for $50. He said he bought new back in the mid 60’s. After checking Theo Wanne’s site I found out it was true. It has the markings of a 2nd generation FL Link w/the small USA on it.
Once in NYC I tried a Non-USA 10* Link at Roberto’s. With a Rico # 2 reed it played great. He wanted $300 for it and that was all the money I had on me while I was in NYC on a Navy Band trip. So I didn’t buy it, BIG MISTAKE, I should have bitten the bullet and burned my plastic. Today that Link is selling for $500-$800 or more.
Horns, at 1 point I traded a guy in Jersey even up for a Conn 10M. I gave him a King Super 20 w/a brass bell and silver neck that was just laying around my house. I really liked the sound of that Conn 10M, especially in the lower register. Conn’s always played better down low than Mk VI’s. But you know what, after going back and forth between the Conn and the Selmer I settled on my Selmer Mk VI. The reasons were, it projected better for me than the Conn, it had more highs and cut to the sound. The mechanics of the MK VI worked better for me. The spatial keys for low C#, B and Bb worked better for me. Also the palm keys on the Mk VI felt better to me. It just felt more modern and sounded more modern to ME. If I only had the Conn 10M and not the Selmer I could have made it work through PRACTICE. However I needed some Money and sold both the Conn 10M which was made in 1941 and was a rolled tone hole Conn and my intermediate model Buescher Aristocrat alto that I bought in a pawn shop when I lived in Baltimore while in high school.
Okay this is really enough. Sorry Doron, I’ve been extremely verbose. See ya later.
Larry W
August 15, 2013 @ 4:18 pm
Wow, I’m not going to even try to respond to all of that! But you bring up some great points about the importance of practice over gear, and the approach of sight reading etudes without stopping no matter what is a great insight.
Thanks as always for the awesome contribution, Larry!
August 19, 2013 @ 10:26 pm
Dexter Gordon used two, count ’em, two, mouthpieces and two, count ’em, two, horns over a 20 year period.
Babbitt Links can be made quite good with a little diagnosis and defect correction. It doesn’t require a mouthpiece facing God to do it, either. I suspect that there are a lot of funky Babbitt Links sitting neglected by frustrated owners, waiting for someone to release their true potential.
August 17, 2013 @ 7:50 pm
Doron:
How current is that picture of Pete Christlieb? He’s playing a Selmer in the picture. He is supposed to be endorsing Cannonball Saxophone’s now.
Larry W
August 18, 2013 @ 9:43 pm
Yeah, I know he’s a Cannonball man now. That pic was taken in 2007, so I’m assuming that that’s before he made the switch.
August 20, 2013 @ 5:33 am
TenorMoxie:
I know Dex used a Conn 10M w/a Hollywood Dukoff until they were strolen in Paris. Then he went to a Selmer MkVI and a FL Link. Zoot also only went through 2 horns and Mpcs over his whole career.
September 28, 2013 @ 11:03 am
Here’s Dexter’s view of the situation, as told in a 1962 interview with Les Tomkins.
“I’ve made very few changes in mouthpieces and reeds. During the time of ‘The Chase,’ I had an Otto Link mouthpiece which had been made for me and I used that until it got stolen around ‘52 or so. That’s when I got the mouthpiece I have now. However, they’re both metal mouthpieces. So in the last 17 or 18 years or so I guess I’ve had just the two mouthpieces. I use a medium strength reed. I’ve been using a La Voz for several years. It’s made in California and I think it’s the best reed on the market myself. It’s pretty consistent.”
“I kinda feel sorry for guys that constantly go through the mouthpiece and reed scene. I wonder how they do it. It must be a real panic scene. Naturally the mouthpiece, the reed and the horn you use are all very essential, but basically your tone, your sound is inside of you. You hear it before you produce it. The real ingredient of the sound is within the individual the way he hears things.”
“Actually this present mouthpiece of mine is relatively small. It’s just medium–size—a five–star. It’s been straightened out a little bit, but it’s not a big mouthpiece. It blows very free and gets a nice substantial sound. Most people are surprised because they think it’s a much larger mouthpiece than it is. They think it’s maybe an eight or nine or something like that, but it’s not. So that’s why I say it’s the projection that counts.”
September 28, 2013 @ 1:07 pm
That was his Hollywood Dukoff that he played w/a Conn 10M tenor sax. But then a few years later both his Conn and his Dukoff where stolen. By the mid-late 60’s Dexter was playing a Selmer MkVI w/a Otto Link. I believe it was a 8 or 8* and he was using Rico # 3’s. Btw- when Dex was using LaVoz it was an independent company. It has been part of the Rico Company for at least the last 25-30 years. I still have a original but empty (to bad right) LaVoz box, the green and black one. It came w/12 reeds.
September 30, 2013 @ 6:02 pm
Zoot too only used 2 mpcs his whole career. Both were HR Brilharts. I believe the 2nd mpc was a Great Neck, Long Island HR Brilhart. Tommy Newsom played the same mpc on tenor.
Also Zoot said in an interview that he only owned 2 horns. While with Woody Herman he bought his 2nd horn a Selmer Super Balanced Action. Zoot said he bought it used, I believe off a college student.
October 6, 2015 @ 12:43 pm
VAMINOS!!!!!!
April 21, 2016 @ 3:43 pm
This is really helpful! I’m really glad I came across this, because I’ve been needing it recently… I’ve noticed my sound quality drop like crazy and I have no idea why. So hopefully these will help with that.
July 11, 2016 @ 11:58 am
Instead of the EEE sound, I found that EH (short E sound) works even better for me, a technique I learned from Victor Morosco over twenty years ago. For me the throat is even more relaxed and open to allow a generous flow of air.
July 12, 2016 @ 9:32 pm
Hello! I’m just a biginner and I want to put into practice all of these tips since I don’t have any teacher! I just wanted to know if it was too wrong to play with both lips rolled in? That’s how I have managed to bring the sound out but I feel it takes me too much effort. How can I change this and adopt a posture that allows me to be more relax?
Any advice is welcome! Thank you!
September 5, 2016 @ 11:53 pm
Players are forever endorsing horns. You see them live or on film and they are always back on their 6. It makes me laugh
September 5, 2016 @ 11:57 pm
Miguel. Both lips rolled in is known as a double embouchure and is very acceptable. The great Johnny Hodges used this technique. Maybe, take in a little less mpc. and stay loose. Don’t bite. If it suits, stick with it, all will be fine. Good luck.
December 5, 2016 @ 1:27 pm
Hi, I’m playing for a year… I’m having a hard time finding music sheets with more than the “Head”; I know I am supposed to learn the head and then create my own stuff, but it is too soon for that I am afraid… Then I listen how big players do it, I see how they take the head which last 30 seconds and make it into a 10 mins solo! It is very slow for my try to figure out the notes the play
So,,,, can you recomend me a website where to find it? I.E. Music sheet transcription from Charlie Parker playin now is time, full transcription, not just the head!
Thank u all in advance!
August 29, 2018 @ 11:45 am
Great stuff ,personally always dug Pete Cs playing from the first time I heard him on a ??? album playing ” I remember bird ” to a live Tom Waits vinyl …think it was ” Nighthawk at the Diners ” then etc . You know ,my two bobs worth is the best mileage I get for improving tone is just playing on the mouthpiece , I can’t believe the difference it has made – wished I had hooked into this a few decades ago ( so obvious – like brass players who just buzz the mp) . Cheers .
February 22, 2019 @ 3:36 am
wow..this is geat information. may God bless you sir. i as a young saxophonist am so much blessed to know such essential knowledge.
The 6 Best Alto Sax Reeds - Complete Reviews With Pictures - SaxHQ
March 23, 2022 @ 2:03 pm
[…] reeds are easy to play as they’re made of cane, and they provide the perfect balance between projection and […]