

David Sanborn’s Reed Preparation Ritual
 Reed preparation rituals – everyone’s got one. We may find ourselves doing things like soaking our reeds in Listerine, or shaving them down with a nail file, or burying them in the ground for 6 months, or just slapping them on the mouthpiece and playing. The goal is to end up with a reed that sounds, and in my opinion, feels as good as possible given the cane as it comes straight out of the box.
One modern saxophone master who has a process which is complex, yet something he swears by, is none other than the great David Sanborn (and yes to my bebop die-hards, Sanborn can indeed burn through changes with the best of ’em but that’s neither here nor there).
Regardless of your horn, mouthpiece, or reed, the truth is, to the outside listener, you sound pretty much like...you. It's not that gear doesn't affect your sound at all, but your biggest and richest sound will only come by developing the skills within both your body and mind to sound great on any setup.
So if you're willing to move beyond having your day ruined by a lousy reed, then sax legend David Liebman's course, Ultimate Guide to Saxophone Sound Production is where you're going to want to go next.
Broken down into bite-sized lessons, this streaming video program covers just about every single aspect of saxophone sound production. It represents his entire life's work teaching the techniques and concepts that were handed down to masters such as Michael Brecker, Bob Berg, and Harvey Pittel (among many others), and then refined over the course of decades teaching countless lessons and masterclasses worldwide. Click below to see for yourself why so many professional saxophonists consider David's thorough, methodical, and practical approach the "real deal" for players at any level.
SAXOPHONETONE.COM
The Ultimate Guide to Saxophone Sound Production

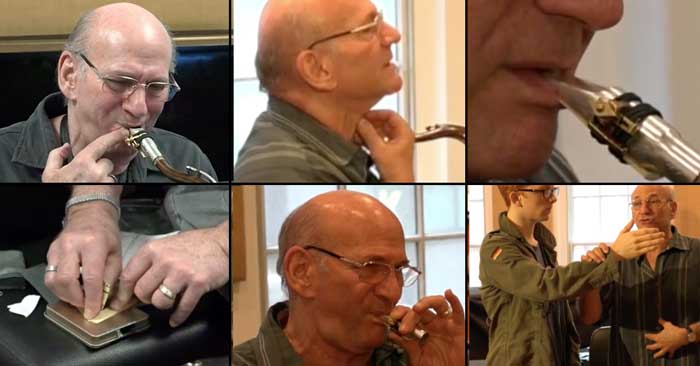
This step-by-step process comes to us via a cell-phone video of incredibly poor quality, but offers an alternative to experiment with, since who among us couldn’t do with a few extra kick-arse reeds, right?
The Process
This entire process takes place over the course of approximately 3 weeks.
- Take the reeds out of the individual plastic covers that come with the reeds.
- Fill a plastic jar with warm water and soak the reeds in the jar for 2 hours.
- Put the reeds back in their plastic covers.
- Dump the water out of the jar, but leave just a little bit at the bottom to keep in some moisture.
- Put the reed covers (with the reeds inside them) in the of the plastic jar and seal the jar.
- Every day during this 3 week process, take the reeds out of their covers, and push the pulp off of the back each the reed using your finger.
- Once the pulp has been pushed off of the reed, play the reed and compare it to all of the others. Scratch the number corresponding to the rank of the reed on the plastic reed cover (the best reed would have a “1” scratched into the cover, of course).
- Every few days during this process, remove the reeds from their covers again, and transfer them into a glass cup with just a little bit of water in it to soak the tip area of the reed, but leave the rest of the reed dry in the open air. Let the reeds dry off this way for 45 minutes. Make sure you don’t lose track of which reed is your number 1, 2, 3, etc. Marking the reed with a marker should do the trick. Sanborn actually uses a product known as a “Reed-Well” for this part of the process, which is nice, since the reed well has slots for the individual reeds in them, and also allows you to number those slots. However, reed wells don’t seem to be available for sale anywhere these days, so we a basic glass cup will have to do for most of us. After the 45 minute tip soaking, play your reeds and see if your reed ranking has changed at all.
- Once you find your best reed, assuming that, like Sanborn, you play every day, leave the reed on the mouthpiece when you’re done playing, and seal the mouthpiece cap on the mouthpiece using tape so that no moisture escapes.
- Once the process is complete, you can have many weeks worth of reeds waiting for you in their damp plastic jar. This is ideal for someone like Sanborn, who spends longs stretches of time on the road. Naturally, during those stretches, while traveling from gig to gig, he doesn’t have time to go through the process of picking out the best reeds.
Making this Process Yours
I went over the video as closely as possible and I believe that this is an accurate a representation of Sanborn’s steps, but I can’t guarantee that I have described every single detail of the process with 100% accuracy, since Sanborn himself doesn’t blatantly spell out 100% of the details.
That said, this process is likely to serve as a great starting point for anyone who’s sick of having to throw away reeds when they could possibly be transforming substandard reeds into great playing reeds. Perhaps this process can be modified to work better for your particular needs, so give it a try and feel free to let me know (either via email or in the comments) whether or not it worked out for you.
October 5, 2012 @ 6:02 pm
When I look at the video, it seems as if he’s trying to tell that he believes reeds (in this case from Vandoren) need to mature in moisture. So, according to the steps above, it’s all about making them wet and keeping them wet enough (hence the small amount of water left inside the jar) but not soaking wet to give them time to mature (and the taking out part is to test them and rank them and clean them).
And then leaving them tip down in water to be able to take them out and play without having to make them moist before use (in case of breaking the current reed on his mouthpiece).
That’s what I made of it.
Another tip I can give you, is to check during this process wether the reed stays completely flat while very moist. Some reeds tend to curve a little, which makes it seal less on the mouthpiece. (not the tip, but the bottom half of the reed right up to below the heart of the reed at the back side) Try flattening that part of the reed, without sanding off the vibrating part of the reed, with something like the glass reed resurfacer from Vandoren (just an example).
October 7, 2012 @ 2:19 pm
I agree TJ. I know that many people swear by keeping your reeds completely submerged in water or mouth wash, but this is a slightly different approach.
What you’re suggesting sounds intriguing as well. I guess it’s up to us to be “mad scientists” and experiment with what works best for us.
Thanks for chiming in!
March 25, 2021 @ 6:21 pm
Anybody know what the heck he means by “pulp?” Is he talking about the bark?
November 19, 2012 @ 10:11 pm
Is this method of reed preperation for a more edgy jazzy tone? Or does this method work well for a round, rich, dark classical, plus, edgy bright jazzy tone?
November 19, 2012 @ 10:51 pm
I don’t see this as having anything to do with tonal color. I think it’s more about developing a responsive reed, and a responsive reed is going to be a great plus for anyone, regardless of the style of music they’re playing. :)
March 25, 2021 @ 6:24 pm
A master player can get whatever sound he/she wants out of nearly any reed/mouthpiece/ligature/horn combination. I opened for Jr. Walker once, and met hm in the dressing room. I asked him about his setup, reed, etc. and he told me this: “It’s not the reed you put on the horn that makes the difference, it’s the LIP you put on the reed!” The point here is to get the maximum number of usable reeds out of a box.
March 12, 2013 @ 10:06 am
After having the reed on my mouthpiece for about two weeks(wich I really enjoyed having it set up all the time because it played the same al the time) I started getting a little blue streak mold I’m sure on the reed. Whats the best way to deal with this? Jim
March 12, 2013 @ 9:26 pm
Hmm, well, leaving a wet reed out in the relative open like that is pretty much guaranteed to result in a moldy reed. That’s why Sanborn and a lot of other guys leave the reeds submerged in water, and in fact, some players keep the reeds submerged in mouthwash or liquor of some sort. Otherwise, I don’t think that there’s any way around the mold as long as you’re leaving the reed on the mouthpiece.
April 5, 2013 @ 8:38 am
During the initial soaking try a sprinkle of baking soda. It is a mold killer and may prevent mold from forming as quickly…
March 13, 2013 @ 10:38 am
I thought Sanborn said once he put a reed on he didnt take it off until it quit playing and that he covered it and wraped it to keep it moist and playing every day helped to keed it moist
March 18, 2013 @ 11:31 am
Duh, of course, I got mixed up with another reed preparation/storage procedure! Anyhow, I’m not quite sure how to avoid the mold, but if it is building up, you could always scratch it off every few days (?).
May 12, 2013 @ 8:43 pm
That´s really good information, thanks a lot.. But I got a doubt.. If you leave the reed inside the mouthpiece, with water, it means that the metal/rubber mouthpiece is with water too ALL the time while you are not playing? I´m not sure if I understood it right :/ I saw Sanborn taking the neck (with MP and reed) out of his case with a bag.. I guess it has water in it?
Thanks a lot! (English is not my languaje, as you can see, ja)
May 13, 2013 @ 2:48 pm
Hello Javi, I don’t think he was saying that you leave the reed attached to the mouthpiece and then leave the mouthpiece and reed in the water. What I got is that once you have soaked your reeds and have picked one you want to play on, you simply leave that reed on your mouthpiece and pack it away in your case like you normally would. The only time you’re leaving anything in water is when you’re preparing the reeds, but once you’re actually playing on a reed, it doesn’t get put in water again. I hope that helps!
May 27, 2013 @ 10:49 am
Thanks, bro! But the reed wouldn´t get like twisted in the top? I dont know if I´m explaining correctly. Like when you get a used reed you have to smash it..
May 28, 2013 @ 1:00 pm
I suppose you’d need to find a pretty big mouthpiece cap with plenty of room in the front.
June 9, 2013 @ 7:15 pm
Hi! I´ve doing what Sanborn says, but at the third day all my reeds start smelling weird, like if they are about to get fungus, and i found them a little bit dark :/ Now I put all of them to dry, but their tips are veery twisted.. What do you recommend? Help! I did it with 15 reeds :/
Thanks a lot!
March 25, 2021 @ 6:25 pm
UGH! Now that is truly disgusting!
December 9, 2022 @ 3:19 pm
Some say those reeds still smell like fungus to this day
June 11, 2013 @ 3:20 pm
Javi, did you leave the reeds you weren’t currently playing inside the damp jar (with just a little bit of water in it)? There should only be one reed that stays outside of that jar.
Admittedly, this is a pretty unusual method. I personally just keep my reeds in a Rico Reedgard. You might also want to experiment with keeping your reeds completely submerged in a water proof container filled with mouth wash – a lot of great players swear by this method.
June 11, 2013 @ 4:08 pm
Yes, i put the reeds that I were not using in the jar, but submerged in water.. I red that mixing 50% wate 50% vodka is better, so I tried it and apparently is working :)
Now I left the mouthpiece with the reed and the cap, in a ziploc bag, and it keeps the humidity, and the vodka taste, ja.
I´ll tell you later what happened. Thanks a lot for helping us. Cheers!
June 11, 2013 @ 7:45 pm
So glad to hear that you’re getting better results, happy if I helped in any way!
September 20, 2015 @ 10:22 am
What on Earth is a Reed well, and where on Earth do I find one to buy?
September 7, 2016 @ 12:13 am
Luke; same place as the klangnbogen, bright and dark thumb hooks, Ishimori stones, altissimo shoelaces….forget it. All that hassle to sound like a turbocharged kazoo !!
May 25, 2018 @ 5:52 pm
I keep a few ready to play reads in the Ziploc bag with a damp sponge . Use a file to fine tune the rough spots on front and back. This week I am trying something sugested by Mark Vinci. He stores rieeds soaking in white vinegar in the refrigerator. I am only trying it because I think he’s brilliant . This Reed stuff is kind a new to me since I’ve only been playing for 60 some Years. Proud and happy to be a Vandoren endorcer.
May 26, 2018 @ 4:15 pm
Hello Bill, an honor to have you commenting here! Interesting method – hopefully the reeds don’t smell too bad after soaking in that stuff, but I’d be curious to give it a try. Thanks for sharing that!
PS. Although I have not been bestowed the title of “endorser”, I’ve used Vandoren’s myself nearly my entire playing career, they’re among the least-bad reeds I’ve ever played. :)
October 27, 2021 @ 3:20 pm
I like to hear David speaking/lecturing on the sax.
The Bassoon: An Orchestral And Wind Ensemble Essential | TamecaJones.com
December 25, 2022 @ 8:39 pm
[…] Soaking reeds before playing ensures that they have sufficiently wet materials to vibrate and produce an accurate sound. If new reeds are wet for 20 minutes before first being used to break them in, soak them for 2 minutes if older reeds are wet for less than 2 minutes. Over-soaking reeds can warp and turn into mold, and allowing them to soak too much spoils the cane, which can leech beneficial compounds. The soften the reed of a bassoon by loosening it up if it feels too hard. […]